This isn’t really a St. Louis history post. It’s just a description how I created my own version of the Compton & Dry mapped that I detailed in a previous post. However, there’s some history in the drinking section of this post. Read (or skip) through an you’ll learn a bit how the Manhattan, my favorite cocktail, came to be.

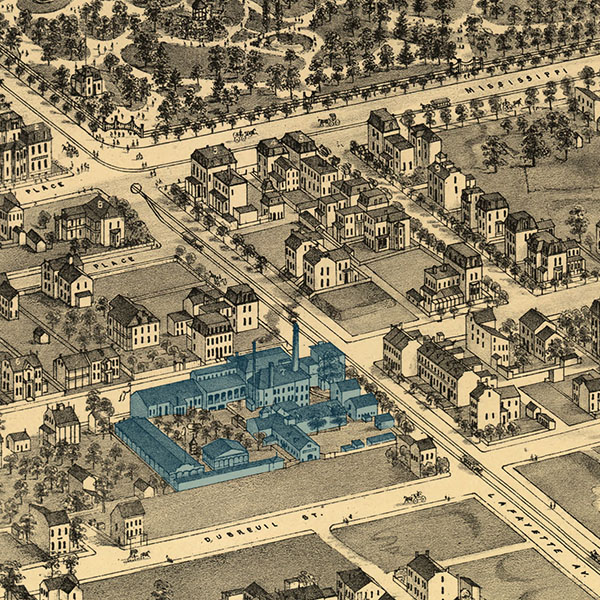
The plan for my own living room version of the Compton & Dry map was to obviously recreate it on a much smaller scale. To start, I’d have each plate printed on 4×6 photo paper. Next, I’d adhere each print to a painted board that is cut slightly larger than the print itself (I wanted each plate to have a small border). Finally, I’d simply glue all 110 plates to my living room wall, recreating the entire view of St. Louis that Richard Compton and Camille Dry published in book format 137 years ago.
For printing, I needed to get high-res images of all the plates. The map is public domain, so downloading them from the Library of Congress website was an easy first step. I uploaded the images to Snapfish, ordered a 4×6 of each, and waited for the prints to arrive.
When they did arrive, I was really happy with how they came out. My only concern was that some of the prints had a noticeably darker tint. But, my goal was not to create something exact. I wanted to make it look “crafty” (for lack of a better word). I thought the color variations would likely add to that effect.
 In the published book, Compton & Dry include a key for how all the plates fit together. This would obviously be my guide. As it shows in the key, there are 16 horizontal rows and 8 vertical columns. If each plate is printed as a 4×6, the map will be about 8 feet long and just under three feet high.
As mentioned in the original post about this map, a closer look at adjoining plates shows Pictorial St. Louis is really not meant to be viewed as a full map. Compton and Dry had made the decision to incorporate some overlap to the pages. It’s very noticeable when viewing certain plates that adjoin vertically.
Take note of plate 38, which sits just above plate 28 in the key. Circled white, the same building has been drawn on both plates. The streets (Russell Ave. and Geyer Ave.) also don’t quite line up.
To help the viewer see the map as a whole, I decided to space all the plates apart by 1/2 inch. With that space, and the small border around each image, I felt the overlap would be less noticeable. I think adding this space also makes the final map look aesthetically better. Butting all the plates up against one another would make it look too cramped.
The next step was the really tedious park of the project: making the woodenboardsthattheprints would mount on. I started by going to Home Depot and buying some cheap pine shelving boards. I cut 110 boards, each at a size of 4.5″x6.5″ (giving the finished plate about an 1/8″ border on each side).

After cutting the boards, I had to sand all 110 of them. For a few days, this is where my neighbors had to think something really weird was going on. I’m pretty much already known in my neighborhood as the guy who sits on his porch at all hours reading and drinking cocktails. Adding to the mystery, I was now hauling out stacks of 4×6 boards and sanding the hell out of them for hours on end. It took some time, but I finally had them all sanded smooth. I hauled all the blocks into my basement and set up a spray paint station. I gave each board two coats of black paint with a satin finish.

Then it was on to gluing the prints to each board. For this step, I used Mod Podge, a craft glue I had never really used before. I started with a layer of glue between each board and print. Then, I put two coats on top, covering the entire board. I used a paintbrush to apply the Mod Podge, so each block has a bit of texture to it. I like the crafty look of it.
It took some time to get through the entire stack of 110 boards, but it was simple process. After a few days, I was ready to get all the boards up on my living room wall.
That is… until I made my first big gaffe.
 And here’s where it haunted me again. Since I was documenting this project with pictures, I decided to stack all the blocks on a table and get a final shot before putting them up on the wall.
Since I still needed to plot out where the boards would actually mount on the wall, the blocks stayed stacked on the table for a few days. While stacked, St. Louis decided to ring in the first humid day of 2012. Not knowing that Mod Podge gets very tacky in humid weather, I soon discovered that many of the plates had glued together. I tried to carefully pull them apart, (and I may have cried a bit as I did ), but I was only able to salvage a few. About twenty plates needed a new layer of glue, but about thirty prints and blocks needed a complete replacement. Ugh.
So, it was back to the hardware store for more wood, back to the craft store for more Mod Podge, and back to Snapfish for more prints. I cut the new boards, sanded them, painted them, and Mod Podged them again. The enthusiasm for this project was long gone, but I trudged on. To make sure I didn’t make the same mistake twice, I sprayed all of the boards with three coats of acrylic sealant to eliminate any potential stickiness.

The step that I thought was going to be the most difficult actually turned out to be the one of the easiest. I was really concerned about making sure the prints were level when mounted on the wall. I was terrified that I’d have 110 plates mounted on the wall and somebody would walk in, look at my project, and promptly say “It slants to the left”.
To make sure I’d get it right, I mocked everything up with numbered pieces of foam board. I used mounting putty to temporarily hold them all in place.

The next step was to replace the foam boards with the finished boards. Again, worried that I’d create something off-kilter, I used mounting putty to stick the boards to the wall and make sure it all looked level. The whole map went up in this manner before permanently gluing anything.
And here’s where my final setback comes in. As I put the final board up, I had a gaping hole in the middle of my map. Where in hell did plate 51 go?

I scoured the house looking for the rogue plate 51 (maybe the cat hid it?). After a couple of days of fruitless searching, I had to go back and make another board. Not tough, but very frustrating being so close to the end of the project.
Finally, the last step was to glue the boards on the wall using Liquid Nails. I used mounting putty again to secure the bottom of the board, holding it in place for a few minutes while the glue cured. It worked perfectly because as it set, I’d verify it’s place with the spacer and level.
The gluing actually took much longer than I expected, but the project was finally completed on May 25, 2012. It took about two months total to complete. Two days later, I showed it off to everyone at my Memorial Day barbecue. I’m happy to say that the final result is even better than I hoped for. And nobody told me it slants left. Below is a series of photographs stitched together to show the map in its full glory.

Since there’s really no history in how I put that map up on my wall, I’ll throw some history into the drink side of things. And there’s no drink better to start with than my personal favorite, the Manhattan cocktail.

Today, the martini is often referred to as the “King of Cocktails”, but the Manhattan actually came first. Before discussing how the Manhattan came to be, it’s important to understand the meaning of the term “cocktail”. Today, a cocktail is considered anything with alcohol in it. In truth, the Choco-licious Martini you ordered at Applebee’s is not a real cocktail, nor is the straight shot of tequila you chased with a PBR. The original definition of a cocktail is far more precise: It is a drink that contains a spirit, is sweetened with sugar, is diluted with water, and is spiced with bitters.
People with knowledge of the recipe know that only one more ingredient is needed for a Manhattan cocktail: Vermouth. Originally made in Italy and France, vermouth is a fortified wine that was initially used for medicinal purposes. In the mid 1800’s, people started mixing vermouth into cocktails. In America, the red, sweet, Italian kind became especially popular. That’s where the Manhattan (followed closely by the martini) got its start. Here’s one of the earliest recorded recipes of the Manhattan, taken from the 1884 publication How to Mix Drinks – Barkeeper’s Handbook.

What’s really interesting to me about this recipe is the type of whiskey is not specified. I had been told the original Manhattan recipe insists on rye whiskey. Actually, David Wondrich, author of the terrific book Imbibe! writes that of the twenty or so pre-prohibition recipes he consulted, only four specify which type of whiskey to use, and two of them call for bourbon. Wondrich elaborates that the type of whiskey is not as important as the proof. In his opinion, 100 proof rye will make an ideal Manhattan, but 100 proof bourbon will make a better Manhattan than 80 proof rye.

The actual origin of the Manhattan is still debated today. A popular story is that the drink was invented for an inaugural banquet held by Jennie Jerome, Winston Churchill’s American mother. According to the story, she asked a bartender to make a special drink in honor of Samuel J. Tilden, the 1876 Democratic Presidential nominee. A good story, but there’s no truth to it. Jennie Jerome was in Oxfordshire giving birth to baby Winston at the time of the inaugural balls in 1876.
What is known is that it’s named for the New York city borough where it was invented. Many sources credit the cocktails origin to a bartender by the name of “Black” at a bar located on Broadway near Houston street.Today, the Manhattan is still considered one of the classic cocktails. It is often the subject of wide variation, with some bartenders serving it on the rocks in an old-fashioned glass (shudder). Other variations include the Rob Roy, which uses Scotch whiskey, and the Dry Manhattan, which uses dry vermouth instead of sweet.
Many of these variations will be discussed (and debated) in this blog going forward.
Notes:
As mentioned earlier in this post, the book Imbibe! by Davide Wondrich is a great book to learn about the history of specific drinks and cocktails. Focusing more on the craft of making drinks, the Joy of Mixology by Gary Regan is another great resource.


Can you post the high-res images that you downloaded? Thanks.
Sorry, I can’t do that. But, go to the Library of Congress link in the post. You can download high-res images of all of them there.